
This article is derived from my experiences over many years with my pets in my garden. 
Whether with canines (or felines), after a long winter’s wait, we bolt from our banishment lured by greenery beckoning us outside.
Dropping to knees, or bellies, we plunge in with gloves and paws plowing deep into moist soil we’ve missed for way too long.
While each of us pursues their own pathway of preferred plant or prey, this probing and pawing is only the beginning between pets and their human gardening companions.
Nothing equals the loving bond that grows between a gardener and their furry friend(s). Together they dig, cultivate, plant and bury what brings each a sense of purpose and satisfaction.
 For those who’ve never promoted paw prints upon their perfectly manicured plots, they don’t know what they’re missing. They’ve truly forsaken the animal element in the fundamental foundation of gardening: For me, God’s intentional pairing of plant, animal and human sustained by the seasons of life. Of course, furry garden partners aren’t for all.
However, while buds burst into bloom, gardeners joining with their furry friends find fulfillment with this most natural partnership. Sometimes it’s humorous, sometimes exasperating, but always endlessly rewarding.
Tilling through the growing season, pet-accompanied gardeners develop a sense of flexibility and patience from accepting unexpected subtractions and modifications to their plotted plans. While partners may not always agree upon the prioritized placement between plant and bone, they remain bound by that unbreakable bond of gardening together.
Concerned that pets have different perspectives on aesthetics than yours? Adding structural boundaries that are pleasing to you may curb four-pawed friends from pursuing places you prefer them not to go.
Adequate raised beds, decorative fences and gates not only provide pleasant backdrops for bushes, vertical structures for vines, accessibility for harvesting crops, and enhance the grounds, but also provide barriers for your companions.
Of course, anything without barriers should be considered fair game. However, replanting the rearranged or replacing the missing is much less significant than the alternative of solitary gardening for pet-loving gardeners.
While poop patrol pick up is a regular activity and replacing prized potted plants a persistent practice, they’re far less inconvenient than withstanding unpredictable weather or a multitude of munching insects.
Just expect your planting zone to include mysteriously disappearing gloves or trowels, possible tooth-pocked plastic pots littering the lawn, and a driftwood log to provide a prominent perch for some afternoon landscape patrol.
Whether canine (or feline), you’ll find the inclusion of pets provides that final element to both  enhance and complete your gardener’s partnership with plant and soil.
Ultimately, the silhouette of the gardener’s wide-brimmed hat and their partner’s pointy ears against that last ray of sunshine would seem the perfect garden composition.
Safe-Proofing Gardens for your Pets
If you love your pet(s), make them not only welcome but as safe as possible in your garden space.
The ASPCA has a great resource, a long list of plants that are toxic and non-toxic for pets, sortable for dogs, cats and horses.
https://www.aspca.org/pet-care/animal-poison-control/toxic-and-non-toxic-plants
Plotting for your pet(s):
Old rug remnants or door mats placed to catch early morning sun or afternoon shade make great landing spots for naps.
Crumpled foil placed below soft soil surfaces deters felines from using an area as their litter box.
Modify the Hazards
– Use non-toxic chemicals.
– Thoroughly dig in additives such as blood and bone meal, fish and kelp. Spray the area with tea tree oil or citrus spray to deter consumption
– AVOID cocoa or coconut mulches: they are poisonous to pets. Chemicals in cocoa/chocolate can be lethal for pets.
– Fold back sharp metal fence ends. Keep sharp tools off ground.
– Make sure garden stakes are too high to penetrate pets playing chase.
- Plant non-poisonous plants.
15 pet-friendly plants to get started from Great Garden Plants nursery: https://blog.greatgardenplants.com/15-dog-friendly-plants-for-your-garden/
Astilbe Astilbe
Crane’s Bill/Hardy Geranium Geranium
Tickseed Coreopsis
Coral Bells Heuchera
Crape Myrtle Lagerstroemia indica
Perennial Hibiscus Hibiscus
Creeping Phlox Phlox stolonifera
Forsythia Forsythia
Catmint Nepeta
Thymes Thymus
Russian Sage Perovskia atriplicifolia/Salvia yangii
Black-Eyed Susan Rudbeckia hirta
Maiden Grass/Chinese Silver Grass Miscanthus sinensis
Stonecrop Sedum
Roses Rosa
 It originated in China, Korea, and Japan. It’s one of three edible species of Elaeagnus including Autumn Olive (Elaeagnus umbellata) and Russian Olive (Elaeagnus angustifolia). Although both Autumn and Russian Olive are invasive, the Goumi is considered the least invasive of the three but has not shown itself to be a problem in Oregon.

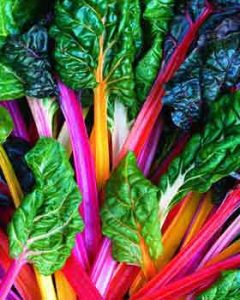
 “Lettuce?” you ask. Not just any lettuces, but the most spectacular crimson, brilliant emerald, speckled and other heirloom varieties grown from your own garden. With varieties such as Merlot, Solar Flare, Trout Back and Outrageous Red, how could your sweetheart be disappointed?


